Welcome to our comprehensive tutorial on editing your Elementor website! Whether you're a beginner looking to make your first changes or an experienced user seeking to refine your skills, this guide will walk you through the essential steps to effectively customize your site. Elementor is a powerful page builder that allows you to create stunning, responsive websites with ease. In this tutorial, we will cover everything from basic edits to advanced features, ensuring you have the knowledge and confidence to enhance your online presence. Let’s get started on transforming your website into a visually appealing and functional masterpiece!
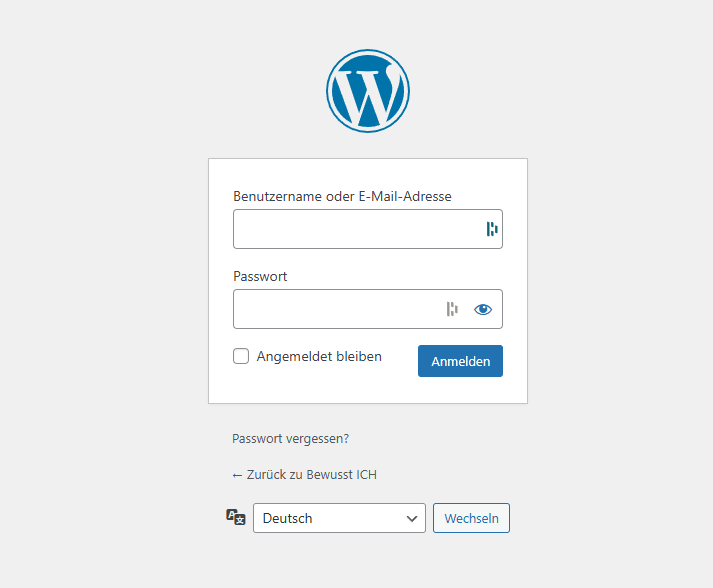
Step 1: Log in to WordPress
To get started, open your browser and go to your WordPress login page. Usually, it's yourdomain.com/wp-admin. Enter your username and password, then click on “Log In” to access your WordPress dashboard.
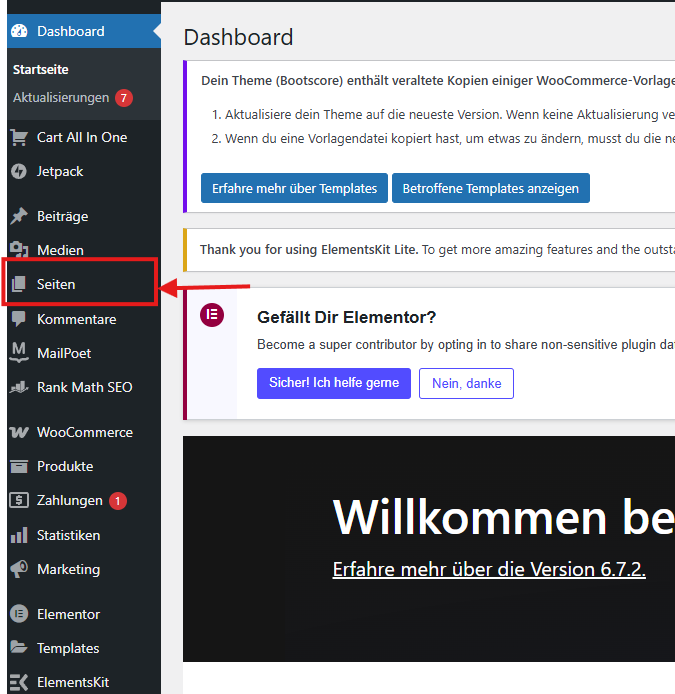
Step 2: Go to "Pages" and Select the One You Want to Edit
In the WordPress dashboard, navigate to the menu on the left and click on “Pages.” Here, you will see a list of all the pages on your website. Find the page you want to edit and click on its title to open it.
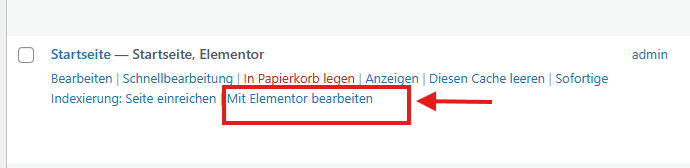
Step 3: Edit the Homepage with Elementor
To edit your homepage, hover over the homepage title in the “Pages” section. You’ll see a few options appear underneath. Click on “Edit with Elementor” to open the page in the Elementor editor.
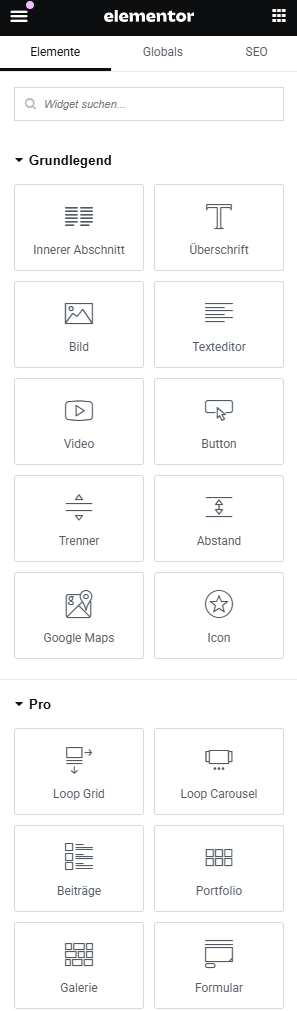
Step 4: Use the Elementor Dashboard to Add Elements
On the left side of the Elementor editor, you'll see a panel with various elements (called widgets) that you can add to your page—such as text, images, buttons, and more. Simply drag and drop any element into the page area to begin editing.
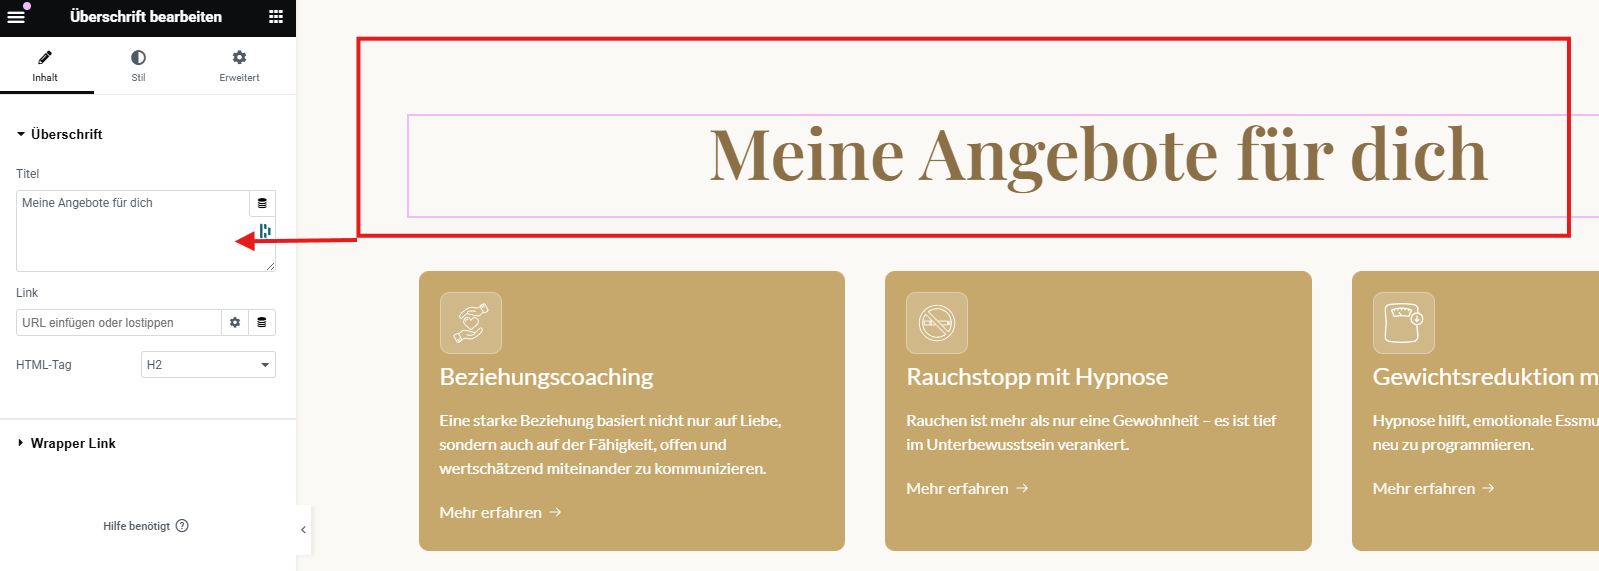
Step 5: How to Edit a Title
To edit a title, simply click on the heading you want to change. Once you do, the left dashboard will display the settings for that element. In the "Title" field, you can replace the existing text with your new heading.
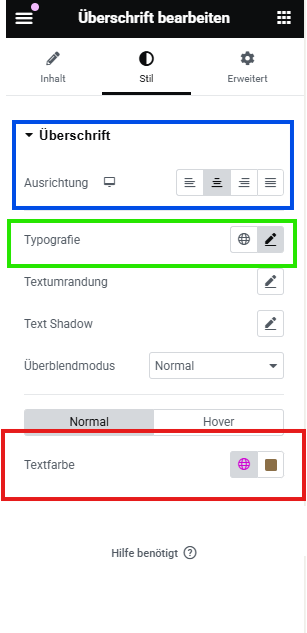
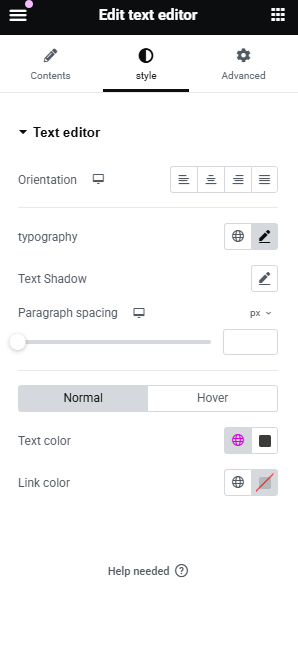
Step 6: How to Edit the Style of the Text
To edit the style of your text, click on the text element you want to change, then go to the “Style” tab in the left dashboard.
- Here, you can adjust the alignment (left, center, or right).
- You can also change the typography—such as the font, font size, and more.
- Additionally, you can modify the text color to match your design preferences.
This gives you full control over the look and feel of your text.
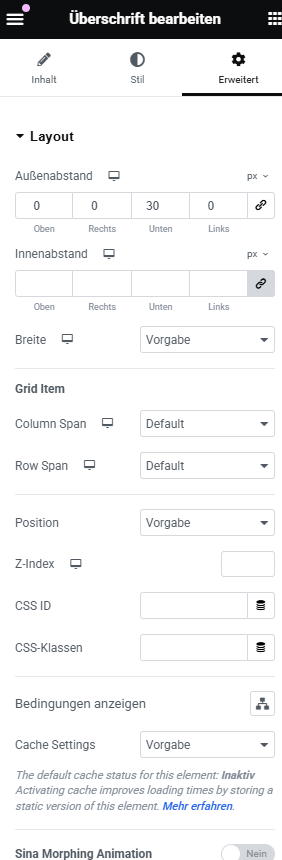
Step 7: Use the Advanced Settings for Headings in Elementor
Once you’ve selected a heading element, go to the “Advanced” tab in the left panel. This section gives you more control over spacing, positioning, and responsiveness.
Here’s what you can do:
- Margin & Padding: Add space around or inside the heading to better control layout and spacing.
- Z-Index: Manage the layering of elements. A higher value brings the heading in front of other elements.
- Motion Effects: Add entrance animations like fade-in, slide, or zoom to make your headings more dynamic.
- Responsive Controls: Set different styles or visibility for desktop, tablet, and mobile views.
- Custom CSS (Pro): If you’re using Elementor Pro, you can add your own CSS for even more customization.
These advanced tools help you fine-tune the design for a clean and professional result.
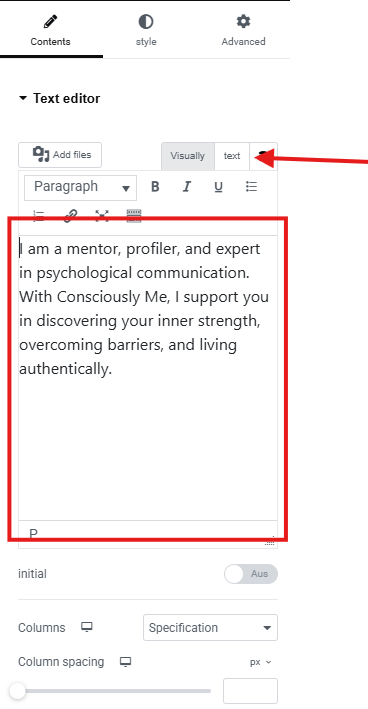
Step 8: How to Edit Text in Elementor
To edit a text block, simply click on the text you want to change. On the left dashboard, a text editor will appear where you can enter your new content.
It’s recommended to switch to the “Text” (HTML) tab instead of the “Visual” tab when editing. This ensures that your formatting stays clean and consistent—especially if you're pasting in content from another source. The "Text" mode helps avoid unwanted styles or spacing issues that can come with "Visual" mode.
Tip: Always double-check how the text appears on the live site to ensure everything looks smooth.
Step 9: Text Style Editing Works the Same as Heading Style
In Elementor, editing the style of a text block (like a paragraph) works exactly the same way as editing a heading. Just click on the text, go to the Style tab, and from there you can adjust typography, alignment, and color—just like you would with a heading element.
This consistency makes it easy to style all text elements across your page with the same workflow.
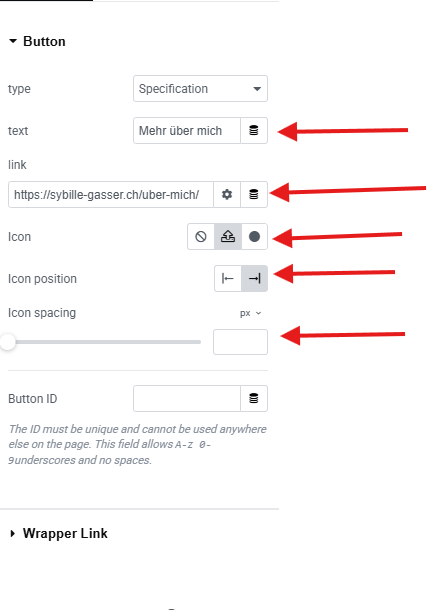
Step 10: How to Edit a Button in Elementor
To customize a button in Elementor, click on the button element and use the options in the left panel. Here’s what you can do:
- Edit the Button Text – Change the label that appears on the button.
- Add a Link – Enter the URL where the button should lead when clicked.
- Choose an Icon – You can select an icon to display inside the button.
- Icon Position – Decide whether the icon should appear on the left or right side of the text.
- Icon Spacing – Adjust the space between the icon and the text for better alignment and design.
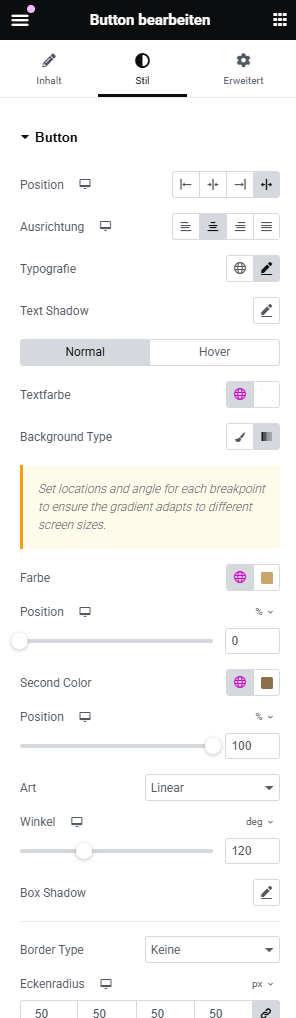
Step 11: Styling Buttons in Elementor (Based on the Style Tab)
When you click on a button and go to the Style tab in Elementor, you get full control over how the button looks. Here's a breakdown of the key styling options:
- Position: Adjusts the button's alignment within its section (left, center, right, or justified).
- Alignment (Ausrichtung): Controls the horizontal alignment of the button itself.
- Typography: Customize the font, size, weight, and spacing of the button text.
- Text Shadow: Add a shadow to the text for extra emphasis or visual depth.
- Normal / Hover Tabs: Switch between the default and hover styles to set different appearances for each state.
- Text Color (Textfarbe): Choose the color of the text when in normal or hover state.
- Background Type: Select a solid or gradient background color for the button.
-
Gradient Settings: If you choose a gradient background, you can set:
- First and Second Color
- Gradient Direction (Winkel)
- Gradient Style (Linear or Radial)
- Color Positions for start and end
- Box Shadow: Adds a shadow behind the button for a more elevated, clickable look.
- Border Type: Choose border styles like solid, dashed, or none.
- Border Radius (Eckenradius): Round the corners of the button by entering pixel values for each corner.
These options let you create unique, professional-looking buttons that match your site’s design perfectly.
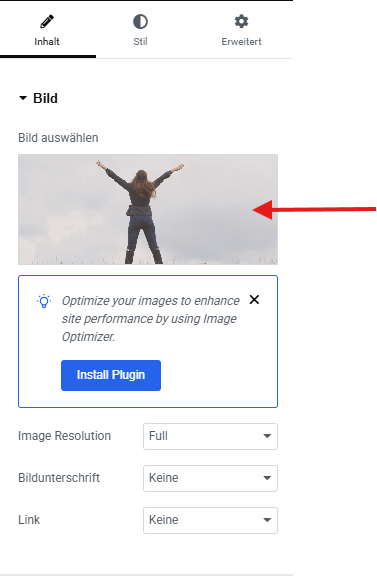
Step 12: How to Edit an Image in Elementor
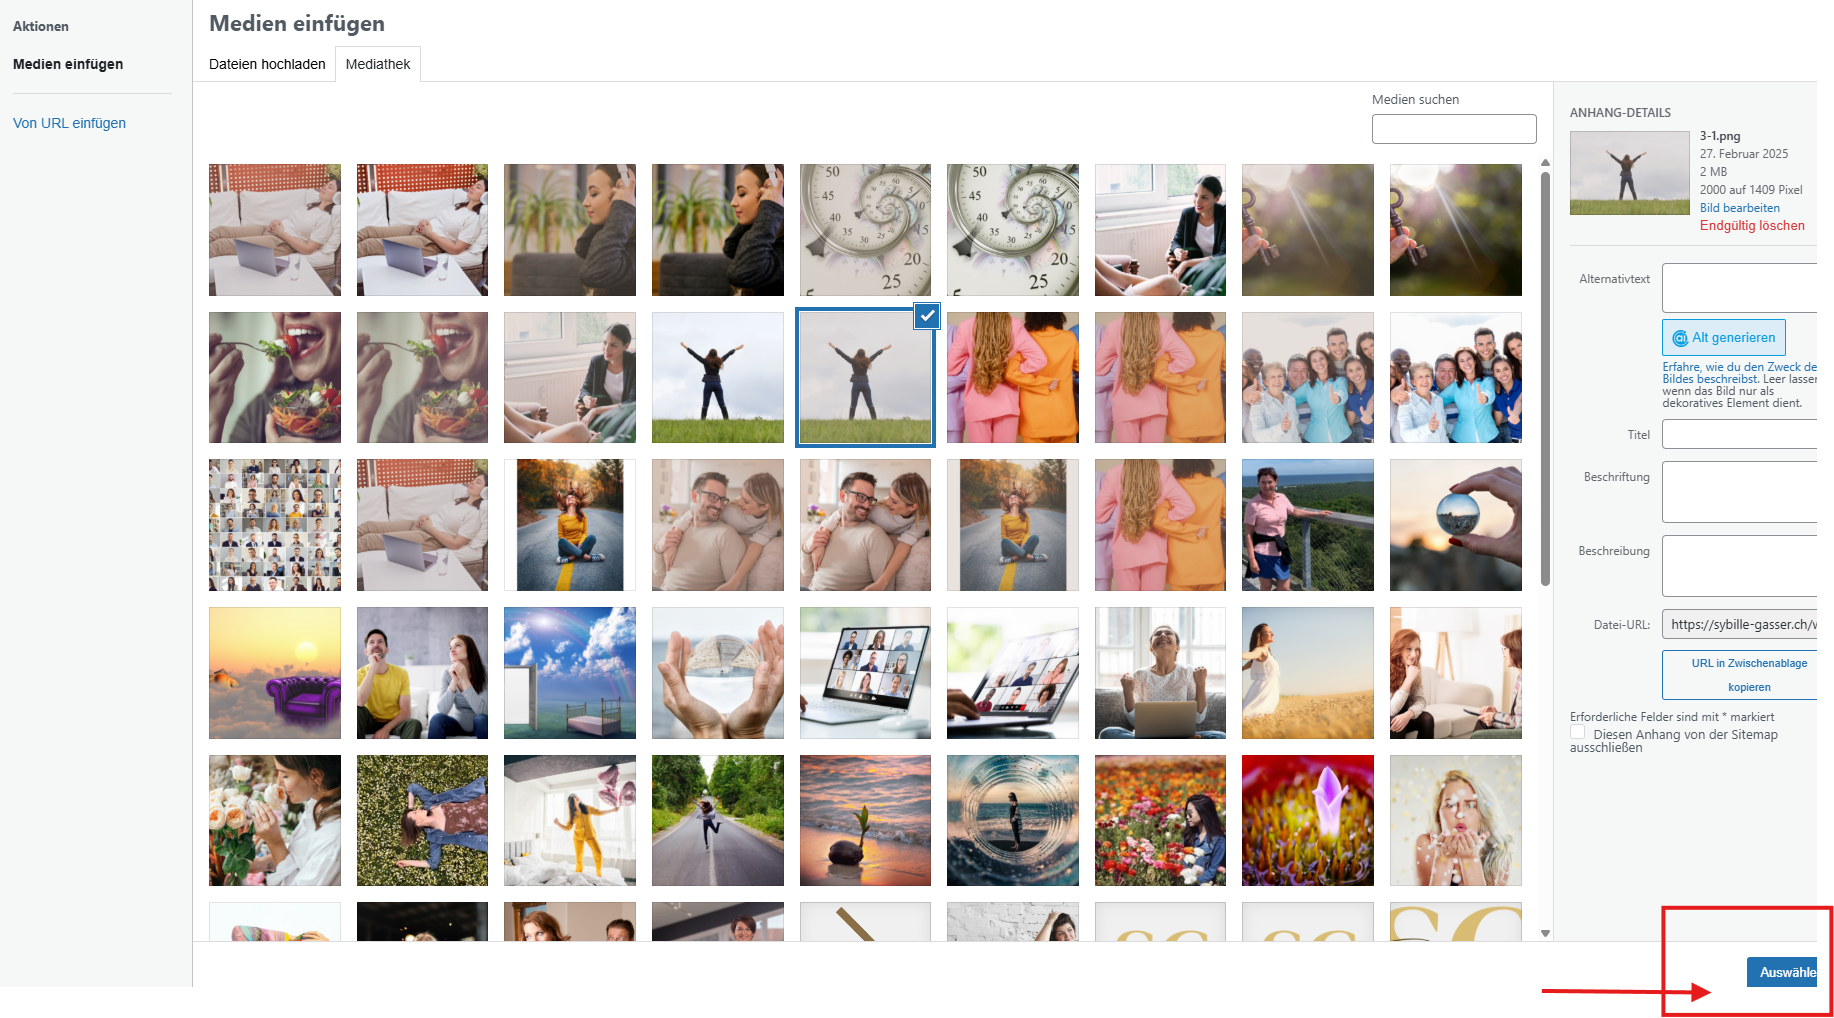
To edit an image, simply click on the image element you want to change. On the left dashboard, you’ll see the image settings.
Click on the “Choose Image” button to open the media library. From there, you can either select an existing image or upload a new one. Once you’ve chosen your image, click “Insert Media”, and it will appear in place of the old one.
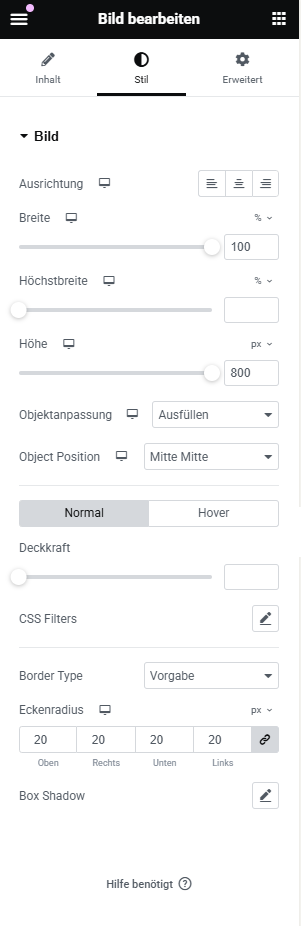
Step 13: How to Style Media (Images) in Elementor
After inserting an image, go to the Style tab in the left panel to adjust its appearance. Elementor gives you several styling options to make your images look polished and professional:
- Width: Adjust the size of the image manually using a percentage or pixel value.
- Max Width: Set a limit to how wide the image can grow on larger screens.
- Height (in some cases): Control the image’s height if needed.
- Opacity: Make the image more transparent or fully visible.
- CSS Filters: Apply effects like blur, brightness, contrast, and saturation.
- Hover Animation: Add subtle effects when the user hovers over the image.
- Border Type & Radius: Add a border and round the corners for a softer or more modern look.
- Box Shadow: Create depth by adding a shadow behind the image.
These tools help enhance your site’s visual appeal and ensure that your media blends smoothly with the overall design.
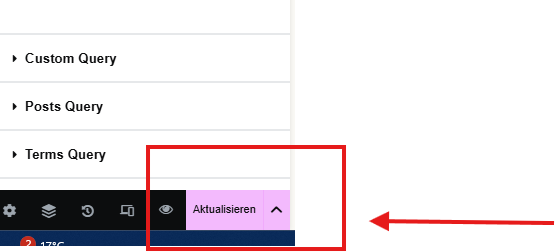
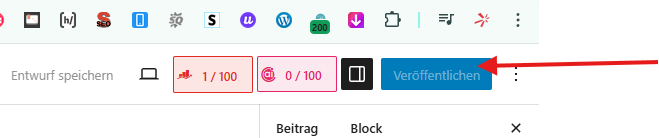
Step 14: Publish Your Changes
After you’ve finished making all your edits, it’s time to make them live! Simply click the “Publish” button at the bottom of the Elementor panel.
If the page was already published before, the button will say “Update” instead. Clicking it will save and apply all the changes you made to the live version of your site.
Always preview your changes before publishing to ensure everything looks as expected.
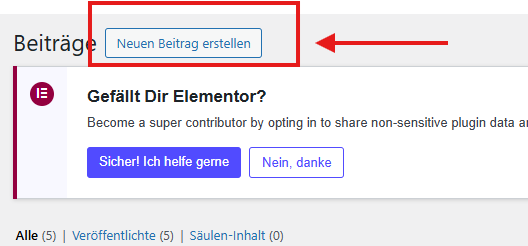
Step 15: How to Add a New Blog Post in WordPress
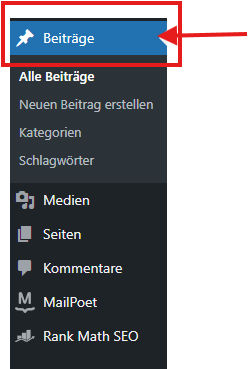
To create a new blog post:
- Go to your WordPress dashboard.
- In the left-hand menu, click on “Posts” and then select “Add New.”
- Enter your post title at the top.
- Add your content in the editor below. You can use blocks for paragraphs, images, headings, etc.
- On the right-hand side, set options like categories, tags, and a featured image.
- When you're ready, click “Publish” to make your post live.
You can also use Elementor to design your blog post visually by clicking “Edit with Elementor” before publishing.
 \
\

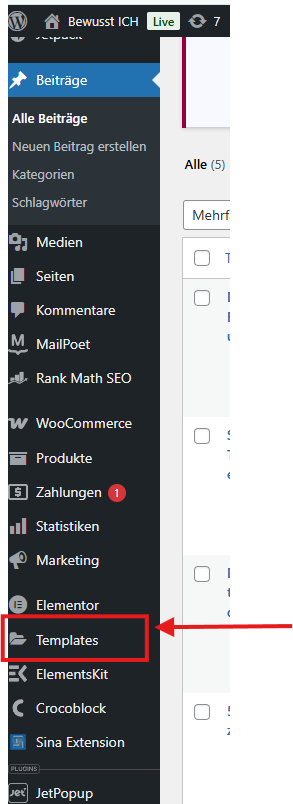
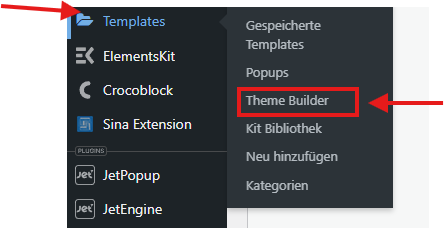
Step 16: How to Edit the Header in Elementor
To edit your website’s header:
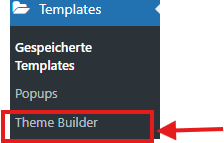
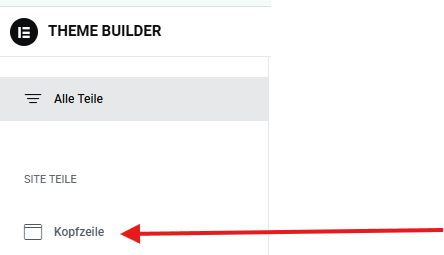
- In your WordPress dashboard, go to Templates in the left menu.
- Click on Theme Builder.
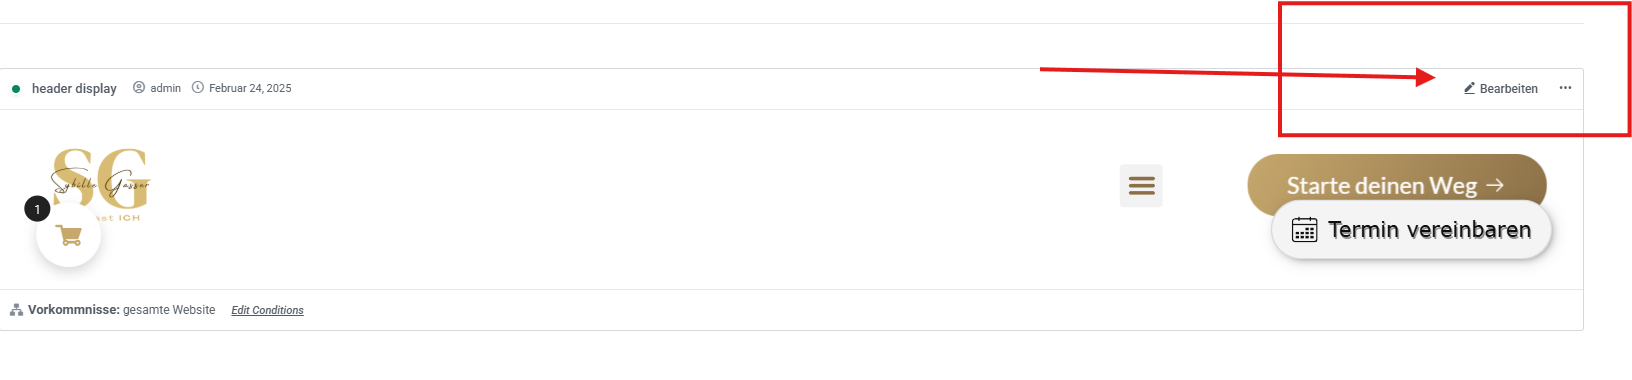
- In the Theme Builder, select the Header tab.
- You'll see your existing header templates—click “Edit with Elementor” on the one you want to change.
From there, you can customize your header using Elementor just like any other section—adding logos, menus, buttons, and styling it however you like.
Step 17: How to Edit the Logo in Elementor
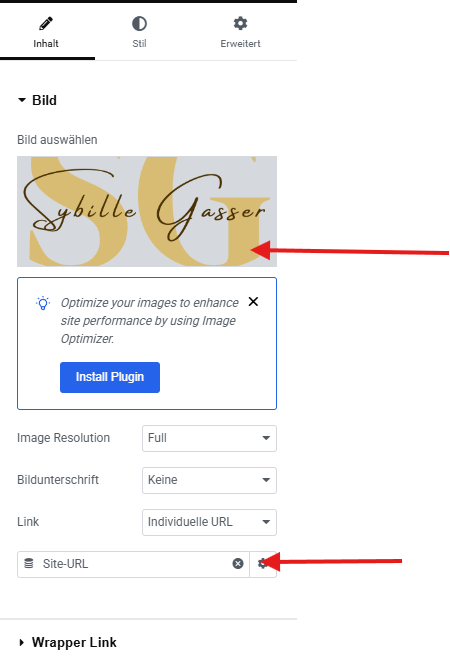
Editing the logo works just like editing any other image in Elementor:
- Click on the logo image in your header.
- On the left panel, click “Choose Image” to replace or upload a new logo.
- You can also add a link to the logo — simply enter your homepage URL (e.g., / or your full domain) in the Link field.
This ensures that when users click on the logo, they’re taken back to the homepage — a common and user-friendly navigation feature.
Step 18: How to Edit a Menu in Elementor
To customize your navigation menu in Elementor:
- Click on the menu element in your header section.
-
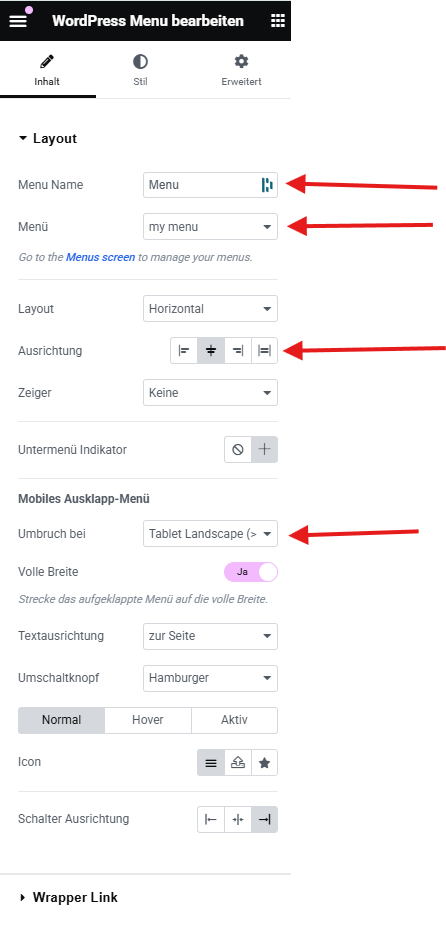
On the left panel, you can:
- Set the menu name (optional label for reference).
- Choose an existing menu from the dropdown — this is a menu you've previously created in WordPress (with the pages you want).
- If you haven’t created a menu yet, scroll down to see the next step explaining how to do that.
- Choose the menu layout (horizontal, vertical, or dropdown).
- Set the breakpoint — this defines when the menu switches to a mobile (hamburger) version for smaller screens.
This way, your navigation menu looks good and works well on all devices.
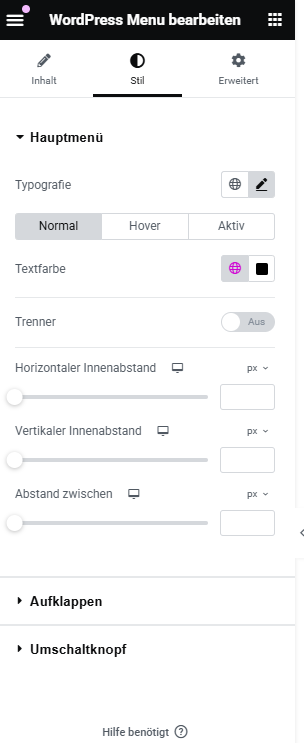
Step 19: Styling the Navigation Menu in Elementor
To style your WordPress menu, click on the menu widget and switch to the Style tab. From here, you can control the visual appearance of your menu items in different states: Normal, Hover, and Active.
Here are the key styling options:
- Typography: Customize the font, size, weight, letter spacing, and more for your menu text.
- Text Color: Set the color of the text in all three states: Normal, Hover, and Active.
- Separator (Trenner): Option to enable/disable separators between menu items.
- Horizontal Padding: Adds spacing on the left and right inside each menu item.
- Vertical Padding: Adds spacing above and below each menu item.
- Item Spacing (Abstand zwischen): Sets the space between each menu item.
You can also expand sections like Dropdown (Aufklappen) and Toggle Button (Umschaltknopf) to customize the mobile menu and dropdown styles.
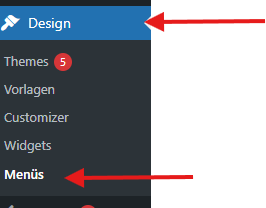
Step 20: How to Create or Edit a Menu in WordPress
To manage your website’s menus, go to your WordPress dashboard and navigate to Appearance > Menus. Here’s what you can do:
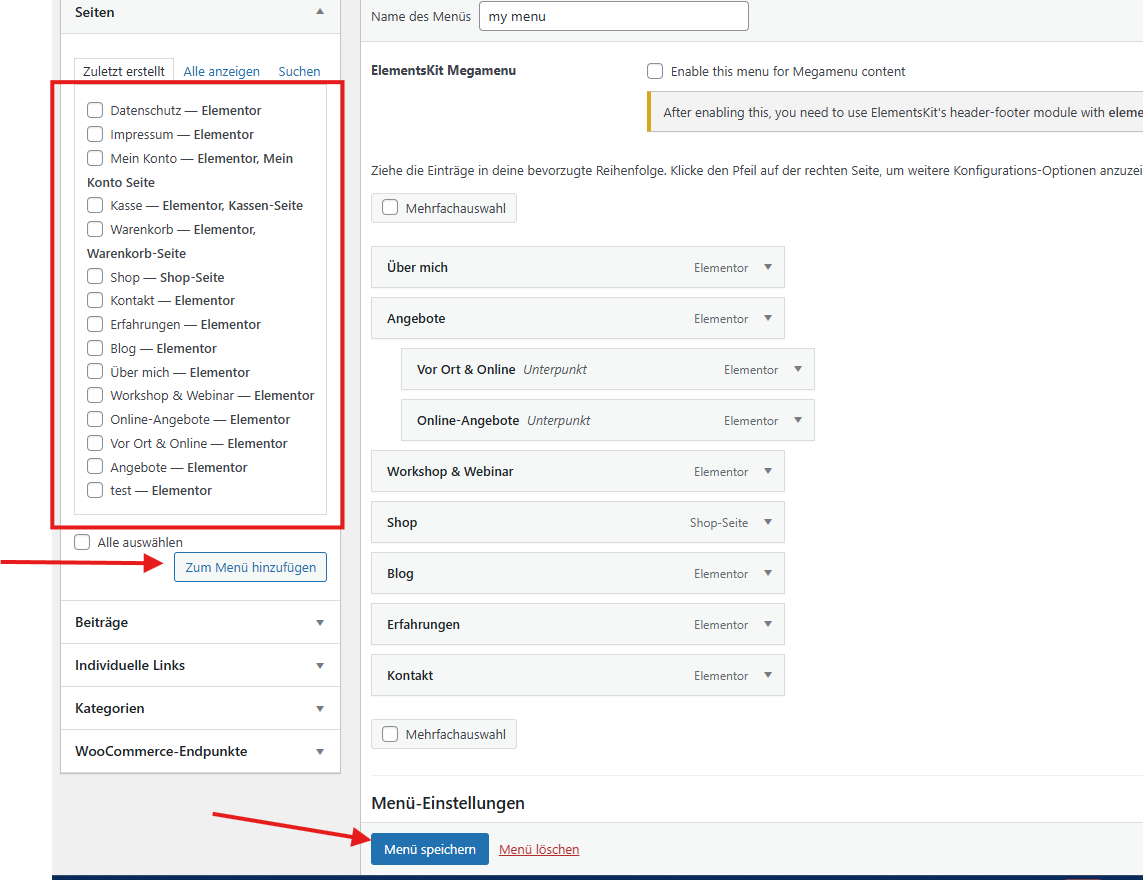
- Create a new menu by clicking on “Create a new menu.”
- Add pages, posts, or custom links to the menu using the options on the left.
- Drag and drop menu items to reorder them or create dropdown submenus.
- Assign the menu to a display location (like Header, Footer, or Mobile).
- Once everything is set up, click “Save Menu” to apply the changes.
This menu will now be available for selection inside Elementor when editing the navigation widget.
Step 21: How to Edit the Footer in Elementor
To edit your website’s footer with Elementor:
- Go to your WordPress dashboard.
- Navigate to Templates > Theme Builder.
- Click on the Footer tab to view your existing footer templates.
- Find the footer you want to edit and click “Edit with Elementor.”
- Once in the editor, you can modify all elements just like any other section — add columns, text, images, menus, social icons, and more.
- When you're done, click “Update” to save your changes.
Tip: You can also set display conditions to control where the footer appears (e.g. entire site, specific pages, etc.).
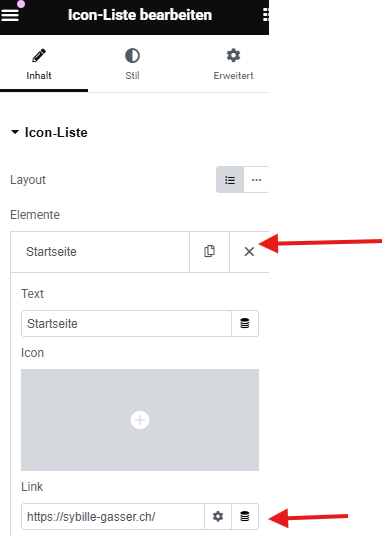
Step 22: How to Edit and Add Items to an Icon List Menu in Elementor
If your menu is built using the Icon List widget (commonly used in footers or sidebars), you can easily edit or expand it:
- Click on the Icon List element in the Elementor editor.
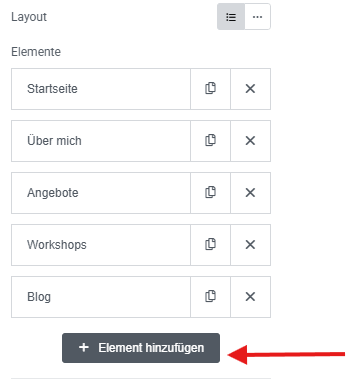
- On the left panel, you'll see a list of all current menu items.
-
For each item, you can:
- Change the text (this is the name shown).
- Edit the link (the URL where it redirects).
- Select or change the icon next to the text.
- To add a new item, scroll to the bottom of the list and click the “Add Item” button. A new list entry will appear that you can customize like the others.
This widget is great for quick, simple menus with full visual control.
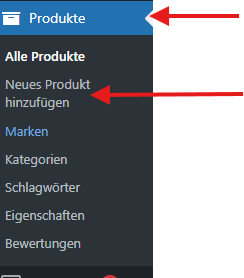
Step 23: How to Add a New Product in WooCommerce
If you have a shop set up with WooCommerce, you can add new products directly from your WordPress dashboard:
- Go to Products > Add New in the WordPress admin menu.
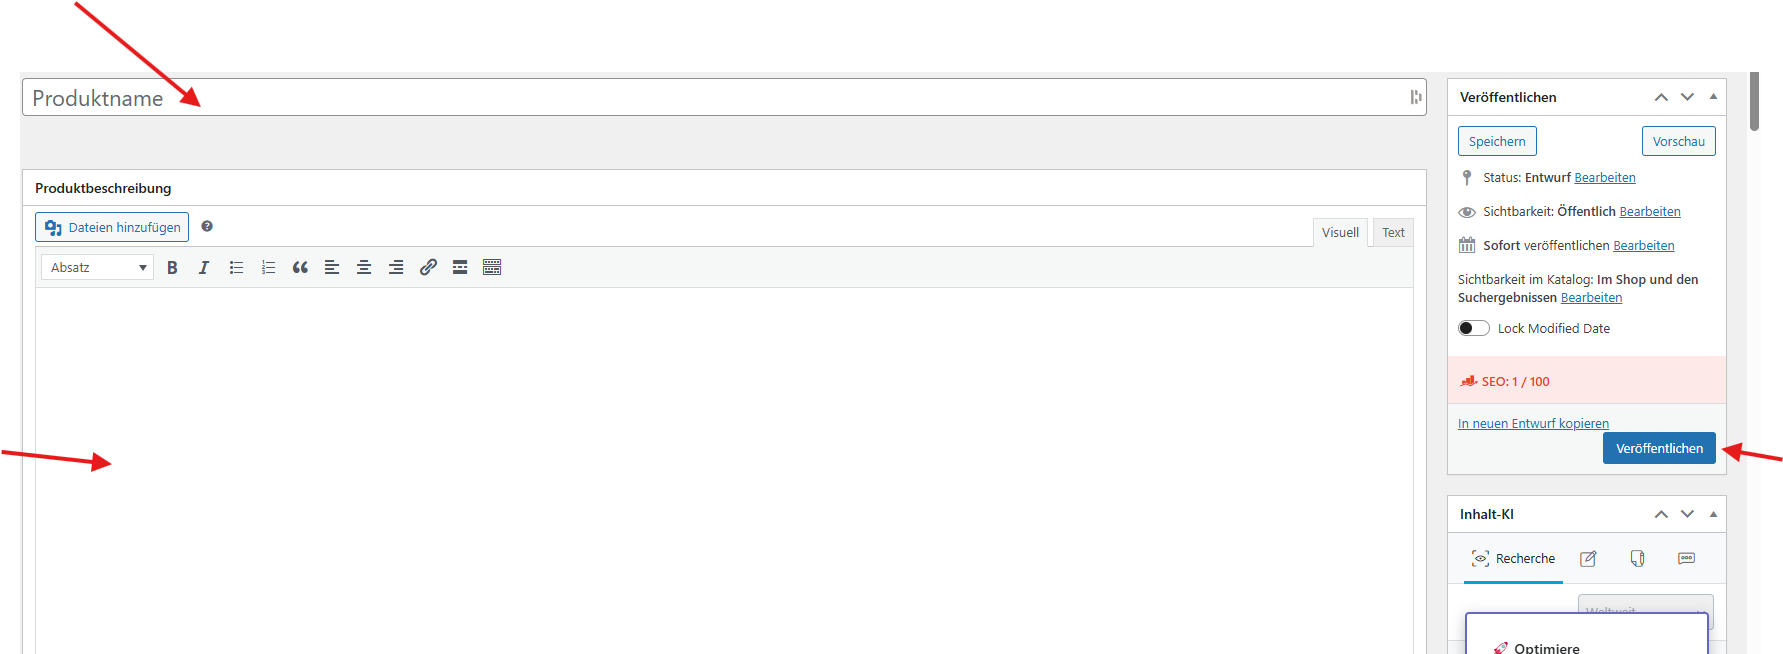
- Enter the product name at the top.
- In the main content area, add a product description (this appears on the product detail page).
-
Scroll down to the Product Data section:
- Choose Simple product (or other types like Variable or Grouped).
- Enter the price.
- Add inventory details, shipping info, and linked products if needed.
-
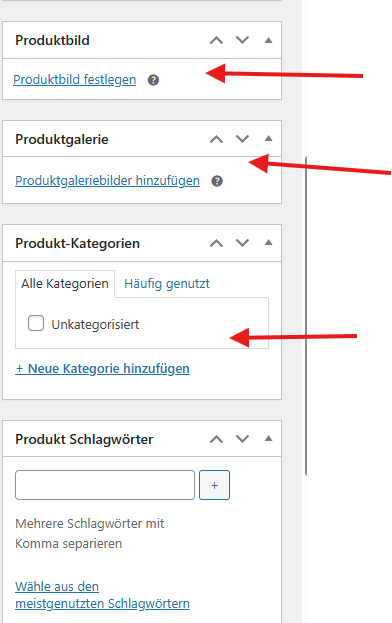
On the right-hand side:
- Add a product image.
- Add product gallery images (optional).
- Assign the product to a category.
- When you're ready, click “Publish” to make the product live in your shop.
Step 24: Choosing the Product Type in WooCommerce
When adding a new product in WooCommerce, you can choose the type of product you're creating. This is done in the “Product Data” section, just below the main description box.
Here are the most common product types:
- Simple Product: A basic product with no variations. Example: a book or a candle.
- Variable Product: A product with different options like size, color, or material. Example: a t-shirt available in multiple sizes.
- Grouped Product: A collection of related products that can be purchased individually.
- External/Affiliate Product: A product that links to another website for purchase.
To choose the type:
- Scroll down to the Product Data box.
- Open the dropdown at the top left.
- Select the product type that matches what you're selling.
Choosing the correct type ensures the right options appear for your customers on the product page.

Final Step: You’re Ready to Build and Launch!
Congratulations — you've now learned how to:
- Edit pages, headers, footers, and menus with Elementor
- Add and style images, text, and buttons
- Create and manage blog posts
- Build and customize your online shop with WooCommerce
- Set up product types, categories, and styling
With these steps, you now have the tools to confidently build, manage, and grow your WordPress website using Elementor.
Take your time to explore more features, test your design, and keep improving. The best websites are never done — they evolve!
Now go ahead — hit that “Publish” button and show your site to the world. 🚀

How to edit a Wordpress website in Elementor